
Canine Fitness & Scratch Board Supplies:
Individual Rear Foot Scratch Board
Fitness Supplies:
Before we teach your dog to file their own rear nails, we’ll prepare with a few foundational fitness tools. These simple props help your dog build coordination, and rear-end awareness before we introduce the scratch board.
-
1 Large Feet Target: Feet Targets for Canine Fitness – Sit Stay Squat
-
1 Cone/Pylon
Scratch Board Supplies:
For this section, you can absolutely reuse your curved scratch board for individual rear foot work – but I found that both the handler and the dog sometimes struggle with stability and precision when using the curved version in this position.
So, I came up with an alternative that’s simple, affordable, and surprisingly effective:
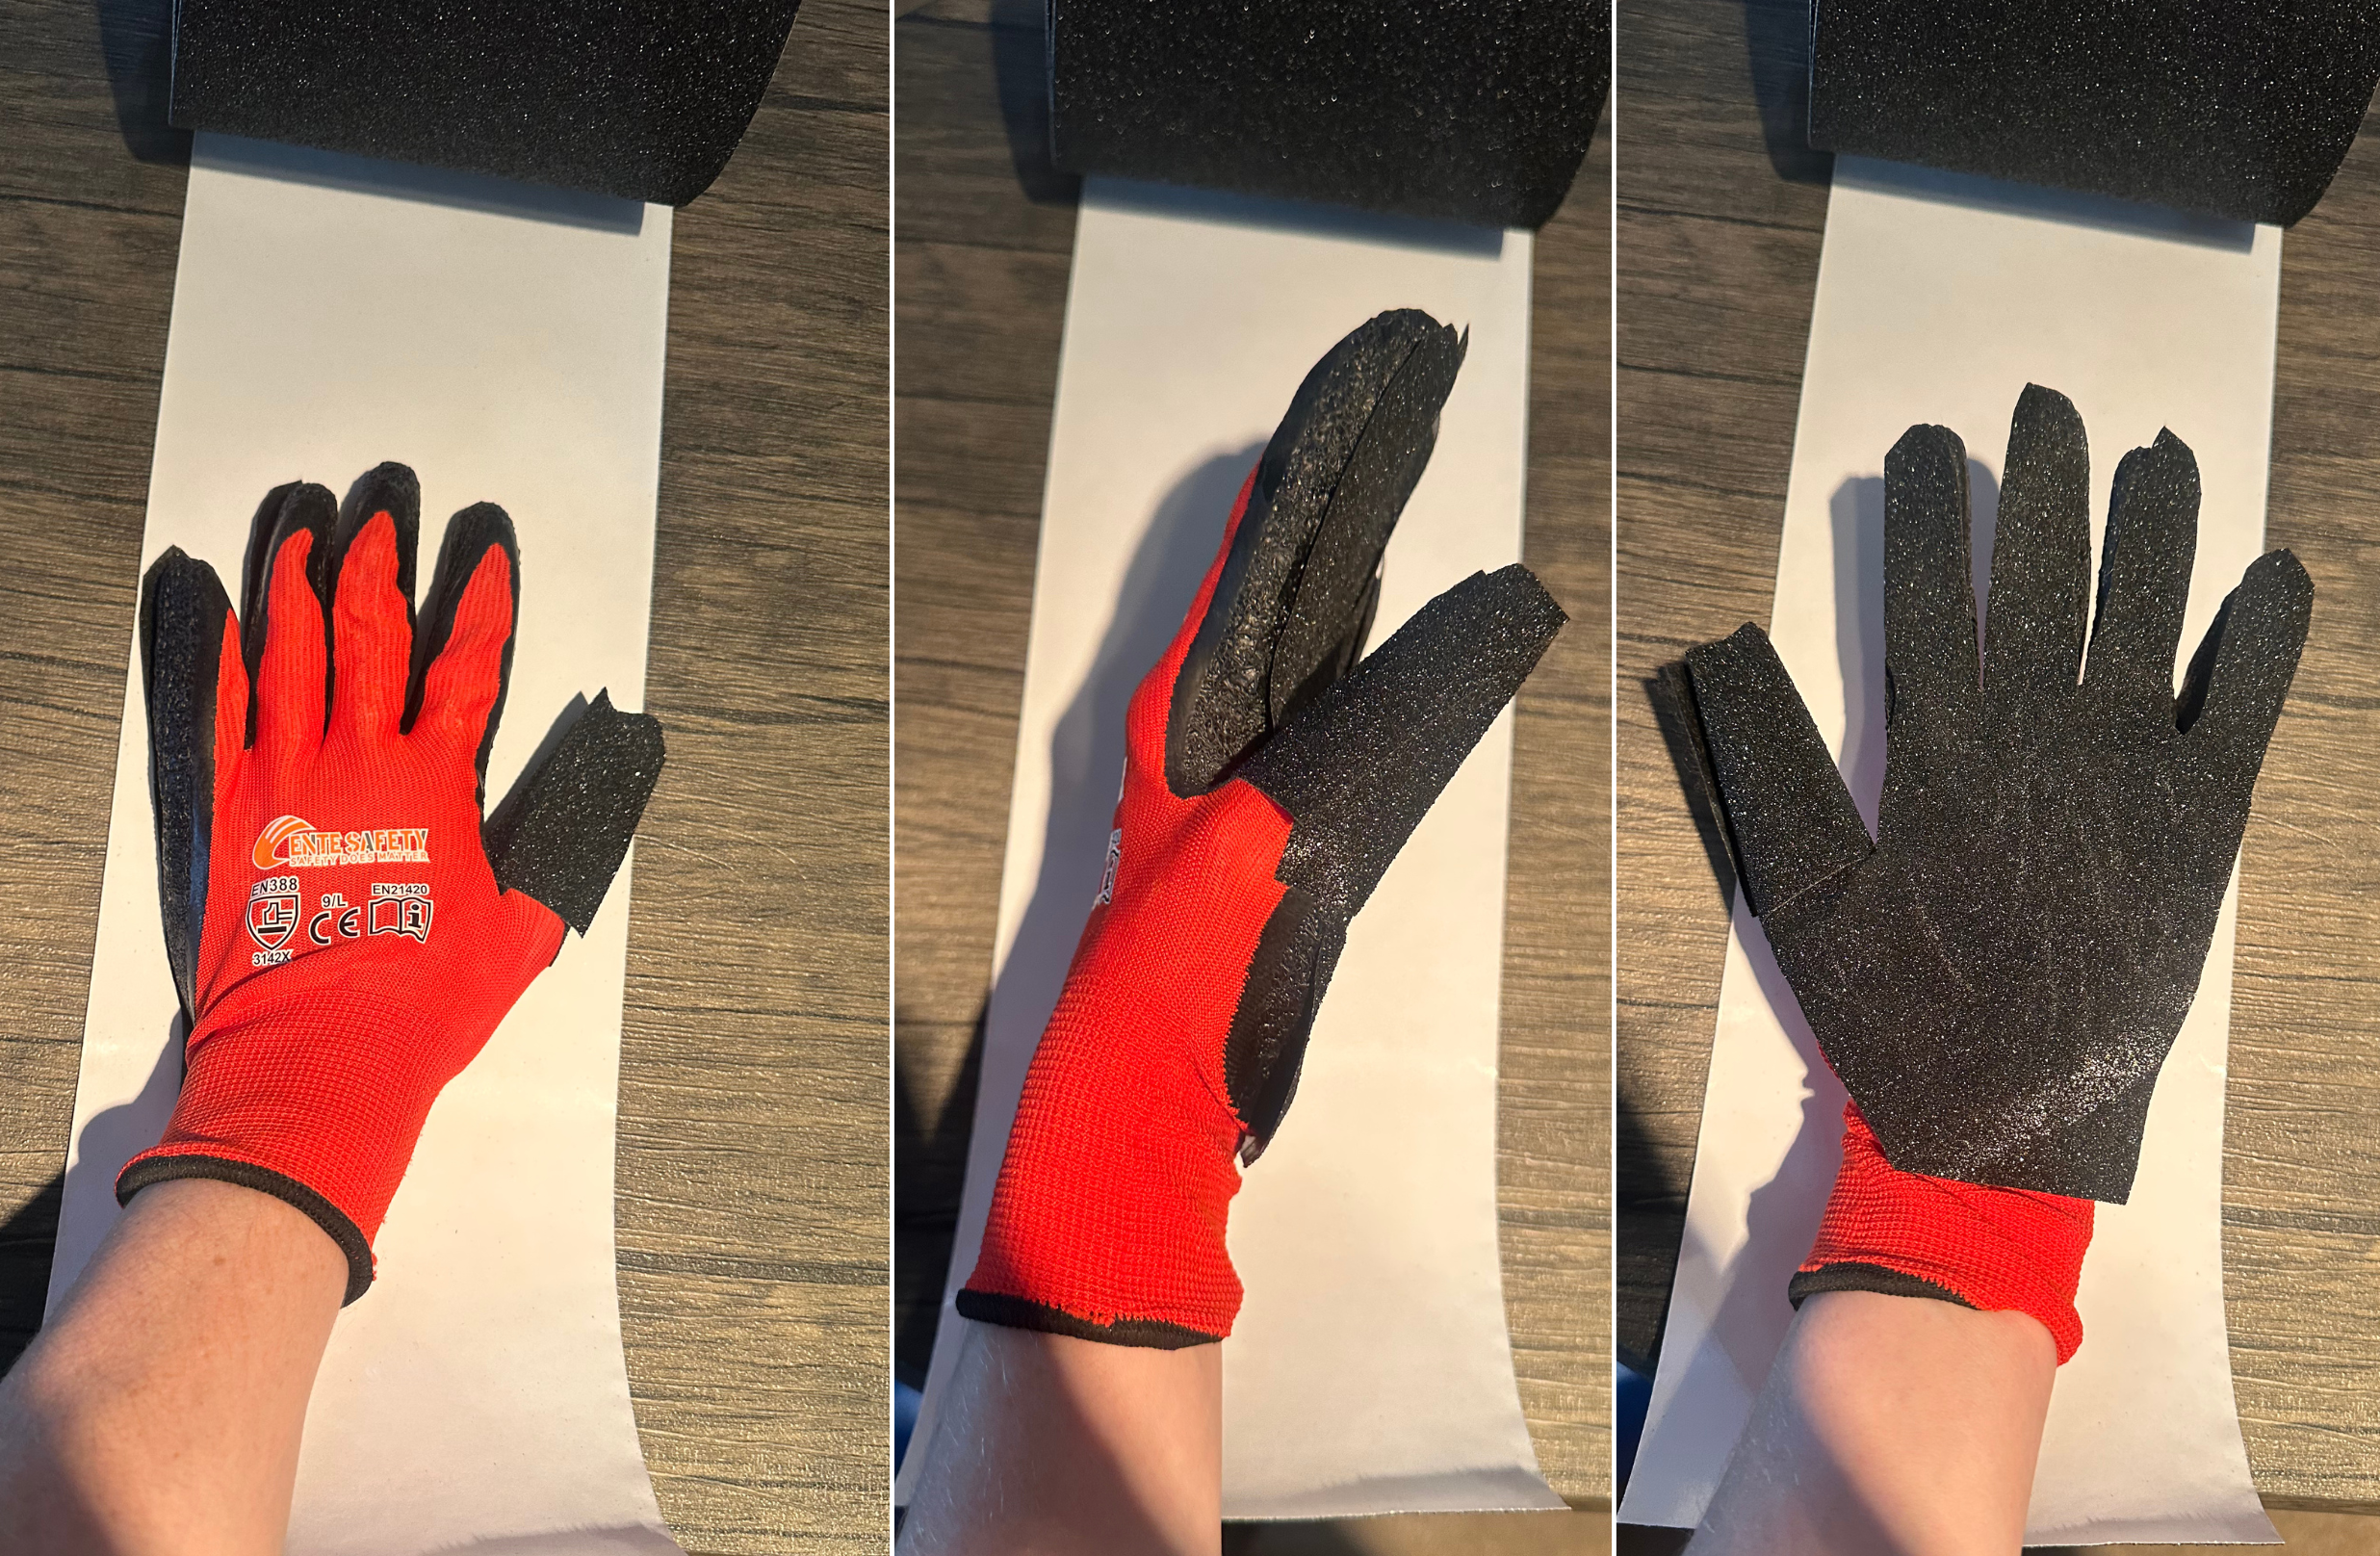
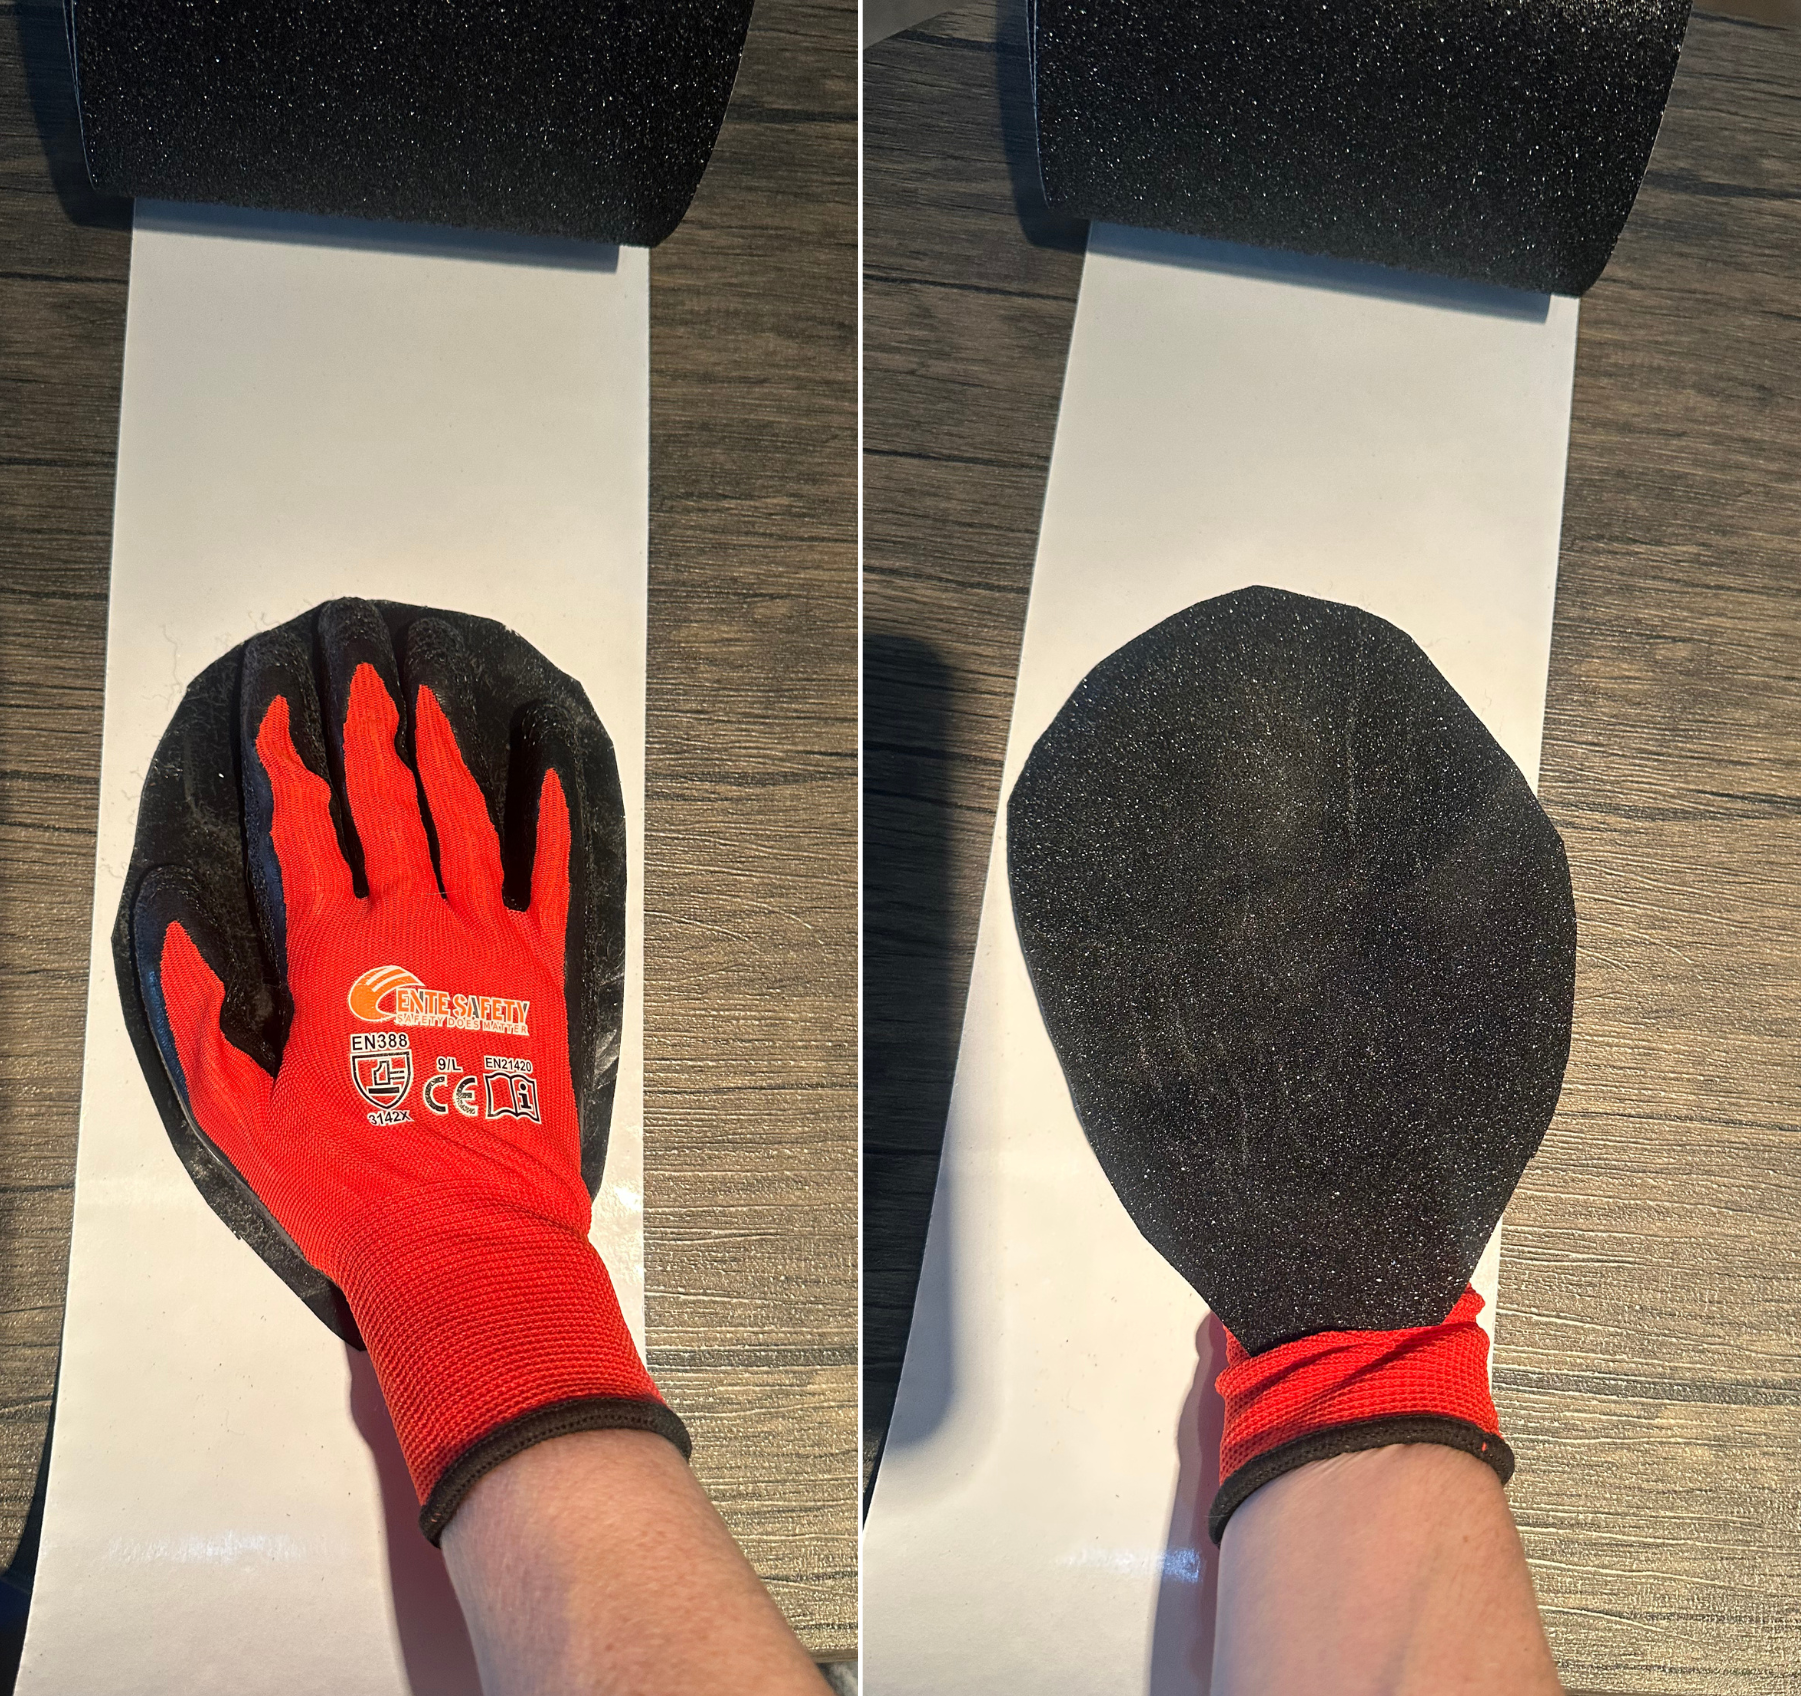
DIY Scratch Glove for Back Nails
Here’s what I did:
-
Start with a cheap “working” glove:
-
I bought mine on Amazon for $3, but any lightweight work glove will do.
-
The glove allows you to manually position the filing surface at different angles, which helps guide your dog more precisely during training.
-
-
Cut and attach the grit tape:
-
Place the glove flat on the backside of your grit (sandpaper) tape and trace the outline of your hand.
-
Then cut the tape to size and attach it to the palm area of the glove.
-
-
Experiment with surface shapes:
-
On one hand, I outlined my palm, and each individual finger
-
On the other hand, I cut one large oval shape that covers my entire hand
-
-
Tip for handling:
-
If you’re right-handed, trace your left hand for the finger outline pattern and your right hand for the oval version – this gives you flexibility to test both and see which your dog prefers.
-
This DIY glove gives you better control, angle adjustment, and feedback, especially when teaching dogs to target their rear feet individually. It’s lightweight, ergonomic, and helps maintain proper alignment during training – without the bulk or awkwardness of holding a curved board.